20.12.15

crafts to cure cabin-fever


photo credit :: ana dziengel / babble dabble do

Tomorrow is officially the first day of winter break from school for my children.  We had planned a little road-trip up towards the mountains for the beginning part of this week, but with heavy rain in the forecast, we've decided to stay home.  Luckily, I've been keeping a list on a piece of paper taped to the refrigerator... a list of crafts, projects and games to keep us entertained during the two week break;  and I'm excited to share my list with you, because this is too much fun to keep to myself!


First on the list is this cup & ball toy created by Ana Dziengel of the blog Babble Dabble Do which (I have to admit) we've already tested.  I couldn't resist, so last week we made three of them, and I can firmly attest to the fact that they are as much fun as they look. No joke -- you have to try this craft.  Instructions can be found HERE. (note: another favorite craft from Babble Dabble Do HERE )

photo credit :: agnes hsu / hello, wonderful

Next is this spool-racer craft.  Do you sense a theme here?  Art which you can stick to the wall with bits of tape (or to the fridge with magnets) is very nice, but as far as I'm concerned, art which you can play with is way better.


Okay, so... we've already tested out this one, too, and I swear these are as much fun as the cup & ball toy.  The cat liked them, too, which added another whole dimension of cuteness and fun. Instructions can be found HERE at hello, Wonderful.

photo credit :: susan gaylord

A few years ago a friend & her children made these charming gingerbread houses out of recycled brown paper bags.  You can find the blog post describing the craft HERE, a video showing step-by-step instructions HERE and templates HERE.

photo credit :: gemma garner

Last winter we made pomanders from oranges and cloves; they dried beautifully and are still hanging on ribbons from the fireplace screen. A few weeks ago my little one asked if we could make these again, and so I have a little jar of cloves waiting in the kitchen cupboard.  Orange pomanders are so easy to make with young children and they smell really lovely.  You can find information about the history of pomanders HERE, some good instructions HERE, plus more instructions on this all-around lovely blog HERE.

photo credit :: helen hiebert / playing with paper

Window stars!  We've never made these. Why not?  I have no idea. With all this rain pouring down, we are going to need a little sunshine and a few rainbows coming in through the window, even if we have to fabricate the sunshine and rainbows ourselves.  If you want to make window stars, too, you can buy waxed kite paper HERE or HERE, and you can find instructions HERE.

Other things on my list: block-crayon drawing, magic color-changing markers, exploring Jan Brett's website (you can find her gingerbread baby recipe HERE), and origami.

Plus games: Crazy Cats, Blokus, Dixit, Sequence for Kids, Shut the Box, Animal upon Animal (Tier auf Tier), Tangrams, and Rush Hour.

Do you have any favorite projects & games for rainy-day cabin fever.  If so, I'd love to know.

19.12.15

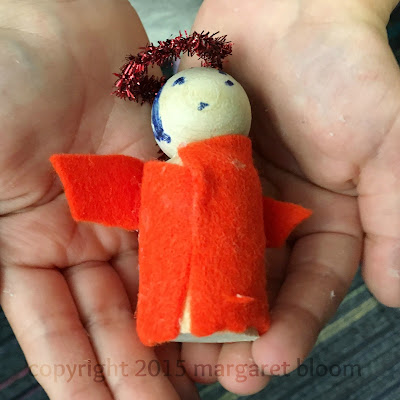
kid-made angels


This morning I was at the library with a group of nearly 70 children and their parents making peg dolls. The theme was angels, though as you can see from the peg doll pup above, each person was welcome to create whatever their heart desired.  The enthusiasm of the gathered group was exciting, and some families were so immersed that they sat at the craft tables for nearly two hours.  The results of everyone's creativity was delightful.

If you would like to make your own angel peg dolls, you can refer to this tutorial for DIY angels I recently created for the blog hello, Wonderful, or you can gather inspiration from these photos, round up a bunch of craft materials and get going! (and if you need peg dolls, there is a list of supply sources HERE.)

Note: I believe it is very important to properly credit the work of all artists; however, due to privacy issues, I don't show faces or list names of children whose work I sometimes feature on my blog.  Please know that it is not out of lack of respect when I refrain from naming each individual child-artist, but out of consideration for their privacy.

16.12.15

cookies


Last December, I stitched up a little runaway gingerman inspired by the pattern from this book. My version is a puppet which can walk (or run), and there is an explanation of how I created it HERE in my post from last year.


Truly, gingerbread cookies are favorites in my house.  We've already eaten our way through one batch and are set to make another batch tomorrow.  The dough is sturdy, making it easier for little hands to roll out and cut nice looking cookies.  Plus, I'm a sucker for just about anything cooked with molasses.


We like the recipe from this book;  the dough is not very sweet, so it's perfect if you are planning to ice the cookies.  We don't generally put icing on ours, so to compensate, I add an extra 1/4 to a 1/2 cup of brown sugar to the batch.  Besides the cookie recipe, the story is a pretty wonderful follow-up to Jan Brett's story of The Gingerbread Baby.


Note :: I was rummaging around online and found Jan Brett's gingerbread baby recipe on her website HERE

14.12.15

tutorial :: mason jar cup cozy


This is a re-post of a tutorial I created last year.  I'm re-posting it because it's been hinted to me (via several sources) that this would make a perfect holiday teacher-gift.  What better way to say "thank you for all your efforts helping to nourish the minds and spirits of my children" then to give their teachers gifts made from my children's worn-out socks?  And why stop at teacher-gifts?  These mason jar cup cozies would make a good gift for just about anyone who appreciates gifts made from worn out socks!


The perverse joys of upcycling aside, I made a resolution last New Year to stop using disposable cups when I bought take-out coffee, so I keep clean mason jars in my car and often get complements when I carry around my coffee (which I find hilarious because they are seriously plain old canning jars).  I also cannot tell you how much I love these drinking lid inserts from Cuppow.  They make me happy every time I use them (and no... I am not receiving any sort of compensation from Cuppow for endorsing their drinking lids).

Keep reading for the easiest tutorial ever...


SUPPLIES
-- A sock or two with holes worn in
    the heels and/or toes.

-- Needle and thread

-- Scissors


Step 1 ::  Cut off the top of the socks, just above the reinforced heel.


Step 2 :: If your sock does not have a thick cuff (where the fabric is doubled), turn sock inside out, roll a 1/4 inch (1/2 cm) hem and pin in place.  If your sock does have a thick cuff, turn the sock inside out, bring the edge up to meet the bottom of the cuff, and pin in place.  Use a needle and thread to stitch hem. (If you've never sewn a hem stitch, here's a link for how to do it.)

(note: sleeves from old, felted sweaters also make great drinking jar cozies; you can cut and hem in a similar fashion as explained above.)


Now to assemble the gift.  I bought a box of twelve mason jars for $10 (this works out to 83 cents per jar) and each Cuppow lid costs about $9, but you can usually find deals if you buy sets of multiple lids.


To make gift tags, we used one of these really cool rubber stamps, or you can find some beautiful & free downloadable gift tags here, here and here.

For additional easy and inexpensive DIY gift ideas, you might have a look at my other tutorials here. Another good source for last minute gift ideas on the wonderful blog Clean is this list of 101 fun, toy-free gifts for kids.  Additionally, Rachel (of the wonderful blog Clean) has written this excellent post on simplifying and enjoying traditions for the holiday season.


10.12.15

peg doll angels at hello, wonderful!


Today there is a DIY Angel ornament tutorial over at the blog hello, Wonderful.  If you'd like to see the tutorial, you can click here!

9.12.15

tutorial :: acorn dreidels


Last week, I spotted this tutorial for acorn dreidels on the blog Growing up Creative.  Brilliant!  These are not traditional dreidels because they don't have Hebrew letters on them, but when it's Hanukkah, every sort of spinning top is referred to as a dreidel in my house.


SUPPLIES
-- Acorn caps (note: we tried out a few different
    types of acorn caps and liked the way these
    ones spun best, but any sort will work.)

-- A small amount of clay (we used Sculpy, but
    again, there's no need to be fussy -- any sort
    will work.)

-- Wooden matches


STEP 1 :: Roll a small amount of clay into an egg-shape and stuff one end of it inside an acorn cap.

STEP 2 :: Shape the top of the clay into an acorn-ish shape.


STEP 3 :: Insert the salt-peter end of your match into the center of the clay and push it down until it hits the inside of the acorn cap...


Like so.


Now your dreidel is done and ready to...


Spin!


And because you can never have too many peg dolls, I thought I'd mention that there are instructions for creating peg doll dreidels in my second book.  For more dreidel fun, you can find edible dreidels here (made them today with my children and they really work). We've also made super fun perler-bead tops according to the instructions HERE at Babble Dabble Do.


Happy Hanukkah

8.12.15

a book review

photo by agnes hsu :: hello, wonderful

I feel so honored by the lovely review of my second book Making Peg Dolls & More by Agnes Hsu of the delightful kid-craft site hello, Wonderful.  Her review features step-by-step photos of a beaded pull-toy snake project from the book...

photo by agnes hsu :: hello, wonderful

Such friendly smiles on those sweet-faced snakes...  
Thank you Agnes for the fun review!

7.12.15

tutorial :: a golden walnut garland


There is a tradition of using nuts and coins as tokens for the Hanukkah game of dreidel, so making a garland of golden walnuts seemed like a beautiful way to decorate our mantelpiece this winter.  If you don't celebrate Hanukkah, golden walnuts would also look nice on a Christmas tree or as a nature-themed ornament for winter solstice.


Besides being very pretty, these golden walnuts were easy enough for my five year old son to create, and all the supplies (except the walnuts) were already sitting in my cupboard.

SUPPLIES

-- Walnuts

-- Gold acrylic paint (silver would be pretty, too)

-- Small screw-eye bolts like these

-- A paint brush

-- White (PVA) glue

-- Some ribbon and cord or string


STEP 1 :: Twist a screw-eye bolt into the top of each walnut.  You should not need a drill because the area in the center, at the top of the walnut, is soft.  Don't worry if the screw-eyes feel wobbly -- you can secure them with a drop of glue later, after you have applied paint.

STEP 2 :: Paint your walnut shells gold (or silver, or whatever metalic paint you happen to have stashed in the cupboard) and allow them to dry.

STEP 3 :: If the screw-eyes on your walnuts don't feel secure, add a few drops of white (PVA) glue at the bases of the eyelets, where they are bolted into the nutshells.


STEP 4 :: Once the glue holding any loose eyelets has dried, add pretty ribbons and then tie your walnuts along a length of cord or string at regular intervals.  Alternatively, if you want to hang these on the branches of a Christmas tree, you can tie a small loop of cord through the eyelet of each nut.


Amid dark days, I wish for all of us, comfort + joy, peace, hope and light.


6.12.15

happy hanukkah


Tonight is the first night of Hanukkah.  During the eight nights of Hanukkah we light a Hanukkiah to commemorate the relighting of the menorah in the temple in Jerusalem after its destruction in 168 BCE; it's a celebration of peace after strife and bringing forth light from places of darkness.

Kindle the taper like the steadfast star
Ablaze on evening's forehead o'er the earth,
And add each night a lustre till afar
An eightfold splendor shine above thy hearth.
-- Emma Lazarus

* * *

note: the color matching Hannukiah (or Hanukkah Menorah) above is a project from my first book.  You can find more information about the book here.

5.12.15

tutorial :: making hanukkah candles


I'd been searching for the perfect Hannukiah for years, and then a few weeks ago, I stumbled across this one.  It's made of bronze, but I love the fact that it looks as though it were made of small branches.  Because Hanukkah starts tomorrow night at sunset, and because we have a new Hannukiah, I decided to make our own candles.  These would make a great Hanukkah gift, and are also a perfect craft for children.

SUPPLIES
A spool of braided candle wick (like this)
Honeycomb beeswax sheets (like these)


STEP 1 :: Using a scissor, cut a beeswax sheet into pieces 1 1/4 inches (3 cm) by 4 inches (10 cm).  Then, cut pieces of braided wick which are 5 inches (13 cm) long.


STEP 2 :: Place a piece of wick along an edge of one of the cut beeswax pieces and gently crimp the beeswax over the wick.  If the beeswax breaks, rips or cracks, you can gently warm the sheet between your palms (or warm it slightly with an electric hair dryer) and try again.


STEP 3 :: Roll the remaining portion of wax sheet around the wick, trim the wick to 1/2 inch (1 cm), and... you're done!