19.7.15

tutorial :: making a peg doll house


Over the past three years I've received many requests for tutorials (and book content) related to peg doll houses & accessories.  I love getting feedback and requests, however, I've hesitated to create tutorials (and book content) for a peg doll house because there are already so many good online tutorials. Last week I posted a round-up of some of the nicest tutorials I've spotted on the web, however, in the course of doing research for that post, ideas started brewing in my head.

Up until now, if any of our peg dolls felt the need to cook a meal or take a nap, they marched off to a doll house which was handed down to our family 11 years ago; in case you want a peek, the doll house shows up in my first book as home to the Three Bears, and in my second book, it appears on page 74.  The peg dolls in my home also sometimes take up residence in castles made of wooden building blocks, so there really hasn't been a need to make a doll house.  

But after seeing so many doll house ideas online, the impulse to make my own was too irresistible. Today I'm posting a tutorial for the house, and later in the week (plus next week) I will have a series of posts on creating peg doll furniture.


SUPPLIES
-- A cardboard box: I started with an 8 in (20 cm)
    cube box, however you could stack smaller
    boxes or use a larger box if you prefer.

-- Extra pieces of cardboard

-- Decorative paper, fabric or paint and pens

-- PVA (white glue) and a glue-stick

-- Scissors, Exact-o knife (or box-cutter), a ruler,
    and pencil


STEP 1 :: Cut the flaps off the box and turn it on it's side.  Cut back the roof section half the depth of the box (for example, my "roof" was originally 8 in (20 cm) so I cut it back 4 in (10 cm) -- see photo above for clarification.

If you'd like to cut windows in the sides, now is a good time (just be sure that they are low enough so that they are not obscured when you add the second floor).


STEP 2 :: The sleeping loft/bedroom is 3/4 the original depth of the box, i.e. the original depth of my box is 8 in (20 cm) so the depth of the sleeping loft is 6 in (15 cm).

To create support for the sleeping loft, add 1 in (2.5 cm) around 3 sides of the floor. Score the cardboard along the added 1 inch sections and cut out the corners (see photo above). Use PVA glue on the three flaps to secure the sleeping loft in place (see photo below).

If your box is a different size from mine and you plan to add a second floor, you can adjust the measurements accordingly.


STEP 3 :: Once the sleeping loft is glued in place, set the house on it's side, use a ruler to draw lines from the top corners of the box down to the bottom corners, and then cut away the sides.  This will allow light into the house and also make it more accessible.

STEP 4 :: To add a peaked rooftop, cut a long piece of cardboard the width of the roof, score & bend in the center, then glue it to the sides of the house (see photos above & below).


STEP 5 :: After construction  of the house is complete, you may choose to cover the floors and walls with decorative paper, fabric or paint.  If using paper for covering the walls and floor, you will want to secure it in place with a glue-stick (PVA/white glue will cause your paper to ripple). You can also add a decorative carpet, and framed pictures to the walls.

Having a selection of decorative card stock on hand is wonderful when working on a project like this. Several years ago, I invested in a several books of paper-crafting card-stock: the designs I used for this project are no longer available, however I own this card-stock book, and thought this one and this one looked nice, too.


In addition to papering the floors and walls, I was tempted to add curtains to the windows and cardboard shingles or paint to the exterior; however, I ultimately decided to keep the decor of my house simple, flaunting it's origins as a recycled cardboard box.


How will you or your children decorate your little peg doll house?  Please email me photos (or post photos on my facebook page) if you're so inclined. And come back soon -- I will have blog posts on creating furniture for your peg doll house!

12.7.15

peg doll homes (and accessories)

doll house & photo :: made by joel

Over the past three years I've received many requests for tutorials (and book content) related to peg doll homes & accessories.  Feedback and requests always make me feel very happy, however, I have hesitated to create tutorials (and book content) for peg doll houses & furniture because there are already so many excellent online tutorials. I didn't feel the need to reinvent the proverbial wheel, however, I thought I'd do a round-up of some of the nicest tutorials I've spotted on the web.

And, of course, in doing research for this post, I've come up with my own ideas.  So next week, I defer to popular clamor and will offer you some simple tutorials of my own for a peg doll house (and furniture!!)  Now, on to my list of charming, clever and very fun ideas for peg doll houses & accessories.

windmill & photo :: creative learning

ABODES
Might your peg dolls like to live in a windmill?  There is an excellent tutorial here at the blog Creative Learning (a few judicious cuts, and that front door will open right up so your peg dolls can march inside).

For peg dolls who aspire to live in a castle, there is a wonderful tutorial at Inna's Creations, while for peg dolls who admire classic, mid-century design, there is this Cheerio box house from Made by Joel.

The design for this well-decorated doll house at the blog Sweet Things is simple & ingenious, this cardboard doll house at the blog Ikat Bag is truly inspirational, and the colors of this box-village at the blog Se7en make my eyes happy.

If it is fairies who need a home, I highly recommend looking at the tutorials over at Daily Colours. There is this cork-covered house, and instructions for building a tree-house here.

Finally, there are these wonderful ideas at Crafty Crow. Or, if you prefer to start with a pre-fab kit, I recommend having a look at these cardboard house-building sets from Lille Huset.

fairy chairs & photo :: anna branford

FURNISHINGS
Marilyn Scott Waters aka The Toymaker, came up with some well-designed peg doll furniture; all you need to do is print out the PDF's, cut and use a few drops of glue to put it together. Might I also suggest you have another look at the doll house over at Sweet Things? I love the bed, the table and the carpets, but what I really admire are the bathroom fixtures sculpted from polymer clay. Additionally, there are a lot of ideas on Pinterest for using Popsicle sticks to make doll furniture.

Now, for fairy furnishings, lovely Anna Branford has instructions for creating a very pretty table plus chairs and drinking goblets, while at Daily Colours, there are instructions for this patio set plus another furniture set fashioned from twigs.  There are also more fairy furnishing ideas here and here.

miniature kitchen & photo :: made by joel

KITCHEN ACCESSORIES
You can find instructions for creating this tiny kitchen set at Made by Joel, while the tutorial for a fairy tea set (made from acorns!) can be found at the blog Twig & Toadstool.

egg carton boat & photo :: life at the zoo

CONVEYANCES
The dolls in the photo above look so happy to be traveling by boat.  If your peg dolls would like to travel by boat, too, you can find this tutorial at the blog Life at the Zoo.  Would your peg dolls prefer to travel by submarine?  There is a very peg doll friendly tutorial for a submersible here at the blog Se7en.  Finally, for those truly adventuresome peg dolls who aspire to visit outer-space, a fine rocketship design can also be found at Se7en. (and oh, my goodness, those space aliens made from bottle-tops? too funny.)

fairy candle & photo :: daily colours

I hope you find some good ideas within the links I've posted.  Do you have any favorite links to places with ideas for peg doll accessories?  If so, please let me know in your comments below. Also, if you're interested, do come back next week for a visit to (and instructions for) my own peg doll house and furnishings.

7.7.15

tutorial :: fishing game


Have you ever spent hours (or maybe even days) working on a beautiful handmade gift for your child, only to have him consider it, set it aside and go back to jumping on the sofa or tossing dirty socks at the cat (or better yet, tossing dirty socks at his brother)?  Okay, so maybe I'm not actually asking about your experience and really just telling you what periodically happens when I make a play-thing for one of my own children.

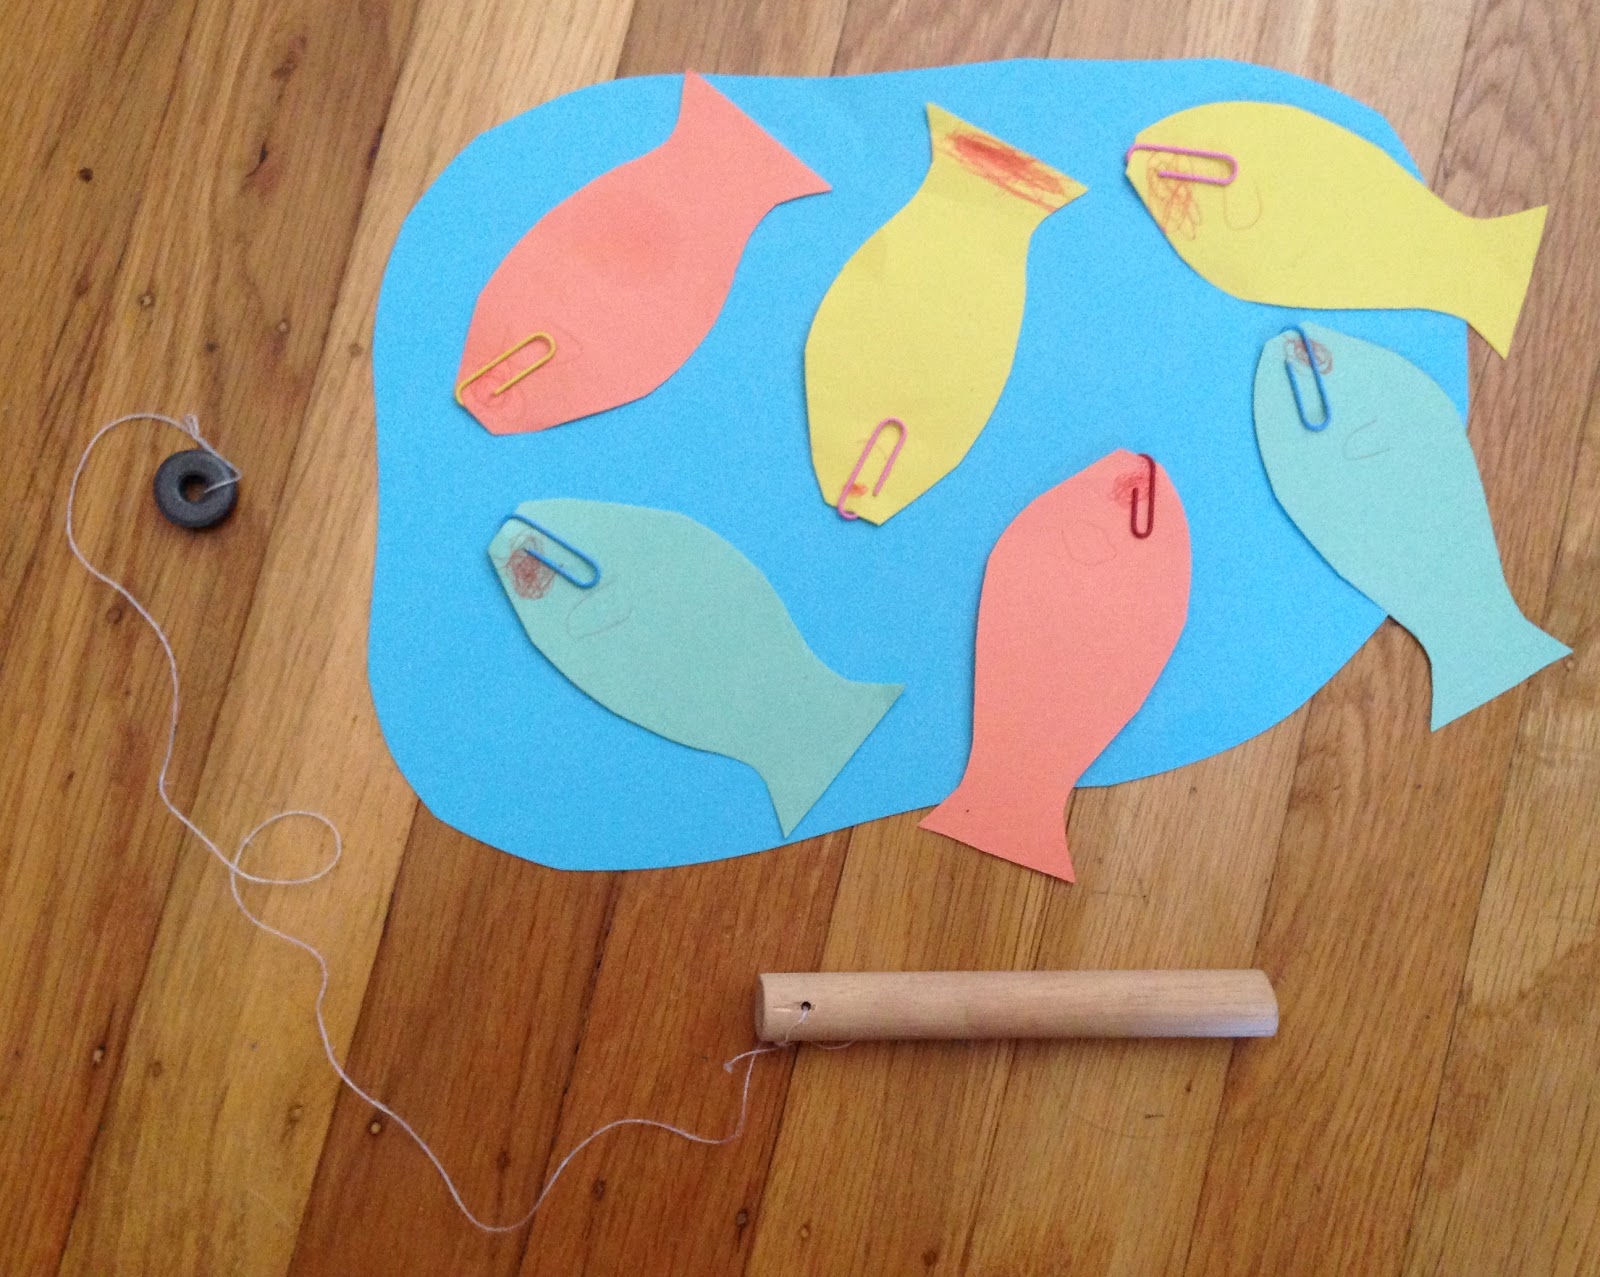
The upshot of those sometimes unenthusiastic responses, is that I carefully consider whether I, again, want to put time and energy towards making something for them which may (or may not) be played with. And so, a few weeks ago, when I wondered whether my little one might enjoy a magnetic fishing game, I was reluctant to dig out needle & thread and embroider some lovely little felt fish for him to play with.  Instead, I cut out some fish from paper, had my boy do a bit of decorating with crayons, added paper-clips to the fish, tied a magnet to a string -- and within twenty minutes, we had a new toy (which, by the way, he played with for quite a long time).


My son's response to the paper fishing toy was so positive that I did, in the end, decide we should put more time and energy into making another magnetic fishing set.  However, instead of stitching up the fish, I considered the fact that my son enjoys working with Sculpy/Fimo type clay.  Hence, creating a fishing game from this material was a great success, and the best part was that my newly turned 5-year-old was able to do most of the work himself.

MATERIALS
2-3 squares of Sculpy or Fimo clay in various colors
6 or 7 small, but very strong magnets
1 round magnet with a hole in the middle
a small piece of cardboard
pencil & scissors
a wooden toothpick
a length of string (perhaps half a meter)
a short stick
a rolling pin or a drinking-cup with flat sides
a baking sheet and oven


STEP 1: Take small chunks of 2-3 colors of your Fimo/Sculpy clay, squeeze together in a ball, press into a pancake and then roll out to approx. 3/8 inch (1/2 cm) thick.


STEP 2: Using a pencil, draw a simple fish shape on a piece of cardboard and cut it out with a scissors.  Our fish-template was approx. 2 inches (5 cm) long.

STEP 3: Lay your fish shaped template on the rolled out clay and use a toothpick to "draw" around the edges of the cardboard template, thus cutting out the fish shape from the clay.


STEP 4: After cutting two fish shapes, lay one of your small (but very strong) magnets in the center of one of the clay shapes, place the other fish shape over the magnet, sandwiching the magnet between the two, and...


STEP 5: Carefully pinch around the edges to seal the magnet inside (note -- I did a bit of smoothing around the edges of the fish after this step).


STEP 6: Place your fish on a metal tray lined with baking parchment or aluminum foil, then carefully read the instructions written on the Fimo/Sculpy packet for baking and follow the instructions exactly as printed.  

Note: DO NOT accidentally heat the oven 100 degrees over the recommended temperature.  DO NOT ignore the timer when it rings. DO remove your Fimo/Sculpy items from the oven in a timely fashion.  Burnt polymer clay smell horrendous.  I speak from experience.   You're welcome.


STEP 6: Tie one end of a string to your stick (our stick is approx. 4 in./10cm long) and tie the other end of the string around your magnet.


STEP 7: Go fishing! Make fish soup! Have fun!


FINAL NOTE: It is important to wear rain boots on fishing expeditions as you will want to to keep your feet nice and dry.  It may also be important to bring along green paper and scissors as it might possibly be necessary to add some aquatic plants to your fishing pond.

29.6.15

peg dolls from germany


Here in the US, it's almost impossible to buy peg dolls with conical shaped bodies, so when I arrived at Castle in the Air last Saturday and spied a basket of these lovelies, I bought a bunch of them.  It was fun to try out doll-bases of different shapes.


Not only did they have conical figures, they also had conical figures with wooden gnome-hats!!


My little one and I have been reading this gnome book, so I got busy right away making some wee gnome children for him. (Plus, we have this pop-up book, which is really sweet!)


I don't think these conical shaped dolls are listed in the online shoppe at Castle in the Air, however, if you call the store, I suspect they'd be happy to ship some to you.  Mother Goose Online also sells a fabulous selection of German-made peg doll bases via mail-order, and in Australia, you can find lovely peg doll bases at Winterwood Toys.

23.6.15

olallieberries


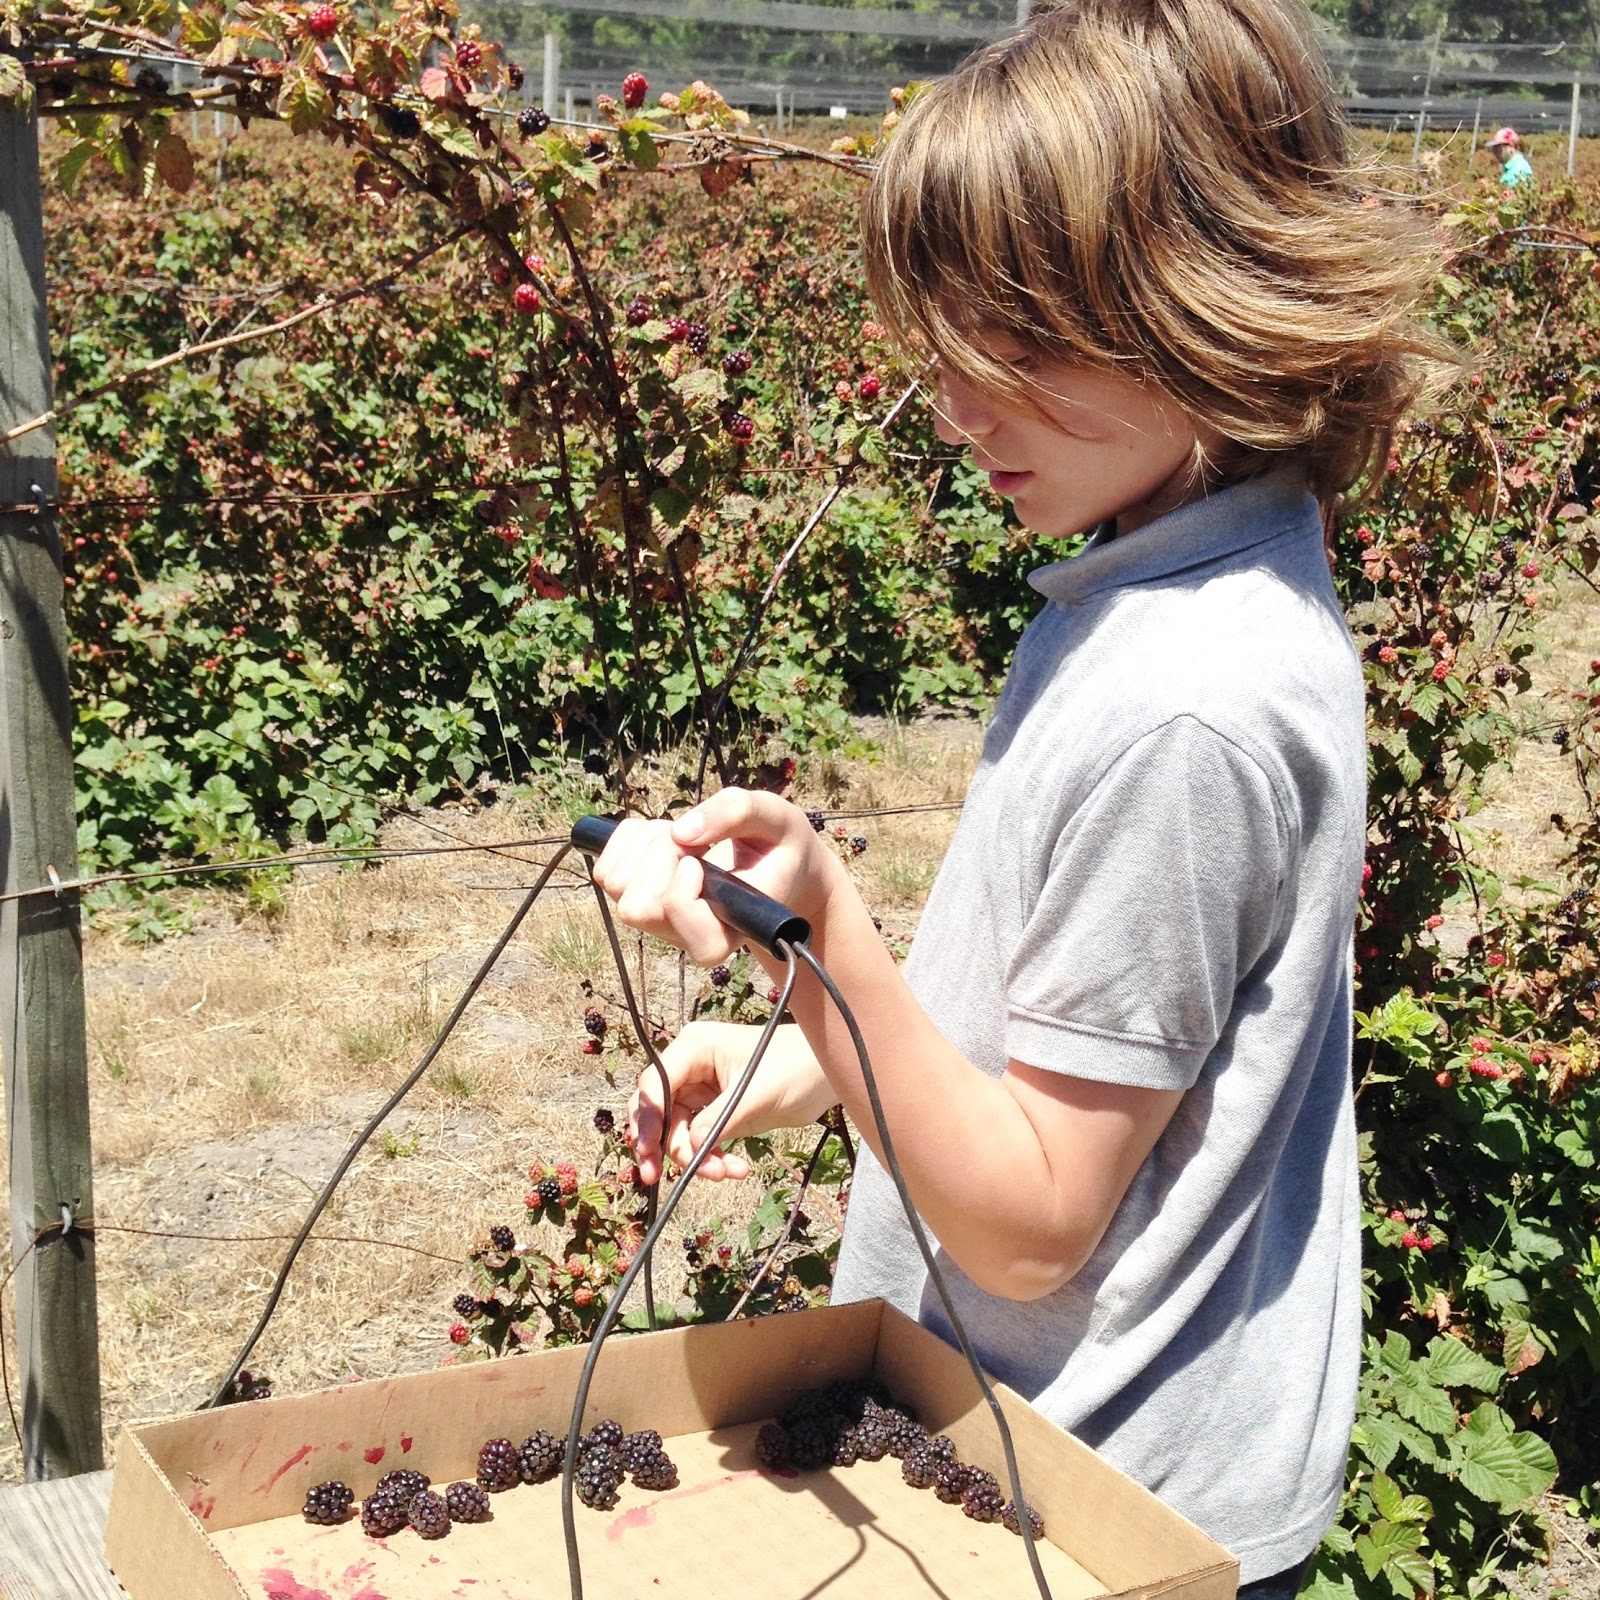
For the past month (or more) my little one and I have been reading the book A Fine Dessert (over and over and over).  The book depicts how one particular dessert, blackberry fool, is made by four different families over the course of 300 years. The illustrations are gorgeous, and the story of the dessert is told in few, but very evocative, words by author Emily Jenkins.  All in all, it's a well researched, fascinating book -- and not only that -- it inspired us to want to make blackberry fool. However, blackberries will not be ripe around here until mid-July, so today we headed off on an olallieberry picking expedition.  On our way home, we stopped at the beach.  The path down was lined with wild radish, mustard, hemlock, and yarrow. The wind whipped at our faces, the sky was very blue and there were wild song birds everywhere.

When we got home, we made olallieberry fool.  An olallieberry jam making session is on the schedule for tomorrow.

21.6.15

visiting the castle


Here are a few photos I snapped yesterday while visiting Castle in the Air for a peg doll making event.  Did you notice the above pic showing a porcelain doll with gorgeous embroidered skirt?  It's a pincushion!  And not only that... Toy Jalanugraha will be teaching a class next weekend on how to make these lovely cushions (vintage porcelain half-dolls and all other supplies are provided).


If you cannot make it to the Castle any time soon, you might enjoy taking a virtual tour by watching the above video.

Thank you, Karima, for inviting me to spend the afternoon sharing my books and my love for doll making.  I always enjoy visiting...

15.6.15

book review :: making needle felted animals


Are you a fan of creating needle felted projects?  Me? Not so much. I like needle felting for adding details to other projects (hello wall-hangings with needle felted clouds and spotted toadstools!); however, 3D needle felting, frankly, left me feeling bamboozled.

Then the new needle felting book from Hawthorn Press, Making Needle Felted Animals by Steffi Stern & Sophie Buckley, landed on my doorstep. Goodbye bamboozlement.


As soon as it arrived, I sat down at the kitchen table with the new book, becoming lost in the gorgeous photography, the friendly tone of the written instructions, and the personal stories which breathe spirit into each project.  Emerging an hour later, I felt confident that I really could turn a big ball of fluff into a pretty little creature. (Though, full disclosure: Steffi wrote a preface for my second book Making Peg Dolls & More, while Lucy Guenot was the designer for this new book as well as both of my own, so I had an inkling that the book would be lovely!)

from Making Needle Felted Animals
photo credit Sylvain Guenot

Of all the projects in Making Needle Felted Animals (birds, wildlife, pets, garden creatures, etc...), the one which captured my heart most was Mole from Wind in the Willows.  In the picnic tableau above, you can see Mr. Toad, Mr. Badger & Mole; and although he is not depicted in this photo, there are instructions within the book for Ratty, too (at the moment this photo was snapped, surely Ratty was over by the boat, fetching an overstuffed wicker luncheon-basket).


I had a variety of Corriedale roving in my stash, but for this project I visited A Child's Dream to purchase some Romney wool (dyed by Wilde Wool) and was pleased with how quickly it felted up (my children liked it, too, and kept absconding with bits of fluff to work up into their own projects).


My only moment of panic occurred when I needed to convert grams to ounces.  This is an important detail for readers in the United States as wool in the US is usually sold by the ounce (the authors of Making Needle Felted Animals specify in grams).  FYI: 1 ounce = approx. 28 grams. You're welcome!


After an hour of needle felting, I ended up with a perfectly podgy mole who is hilariously nearsighted (you can see him squinting myopically at photos of himself in the image above).  The advent of this funny fellow has inspired a spate of reading books containing mole characters;  there is, of course, Wind in the Willows (we love this version with illustrations by Inga Moore), a less agreeable mole in Hans Christian Andersen's Thumbellina, and a most agreeable mole in The Mushroom Man by Ethel Pochocki.


You can purchase copies of Making Needle Felted Animals and all supplies (wool fiber, foam felting pads, felting needles, wool felt sheets, etc...) from A Child's Dream.  The book is also available through Amazon and the Hawthorn Press website.  For other supply resources worldwide, you can check my resources page HERE.

Disclaimer: a copy of this book was provided to me by the publisher, however all statements and opinions are my own.

7.6.15

postcard project


My mom has been going through chemotherapy treatments.  Again.  This is her third round in four years, but who's counting? There's no way to candy-coat it or make it pretty by tying on a pink, lavender or whatever color ribbon.  The t-shirts, hats & buttons from these folks pretty much say it all.

What makes it even more difficult is that my parents live nearly 400 miles away -- far enough that I cannot be there on a regular basis to visit or help.  And so from my kitchen table, I try to think of what I can do. I wish I could flip over my pencil to the eraser side, walk over to my mother's MRI scans and go, "Erase, erase, erase, erase." I call every day and have sent books, pajamas, necklaces, and artwork by my children, but truly, gifts hold little meaning when the only thing any of us wants is for this to go away.


Besides wanting the cancer to go away, what she really wants is us; she would like to see me, my husband & children and my brother as often as possible.  I thought & thought about it, and after a few days, I came up with something which, in my head, I call "The Bubbe Project."  (Note: "Bubbe" -- rhymes with hubby. It is the Yiddish word for grandmother and it's what my children call my mother.)

For the project, I compiled a set of recent photos of my children and had post cards made using the photo-images. Every few days my children write messages on a card or two, and then we drop the cards in the mail.  Now, in addition to our daily phone calls, she gets photos (real photos, not digital) several times a week.  It's not the same as daily visits, but it's been fun and has brought joy.

If you would like to do a similar project, here's how:  I used the online printing service called Moo Cards because, with Moo Cards you can order a set of postcards with a different image on each card.  I am not receiving any sort of compensation for suggesting Moo Cards -- I just like them a lot (I've been ordering business cards from them for years).


Do you have any suggestions for ways to send comfort & joy to someone dear who lives too far away?

1.6.15

peg doll events


Hello all! A quick note to let you know about some upcoming Northern California peg doll making events:

WHEN: Saturday June 20th, 12:00-2:00 p.m. 
WHERE: Castle in the Air, Berkeley CA
WHAT: Acorn cap fairies (see photos!)
COST: Free

WHEN: Saturday August 8th, 11:00-12:00 p.m.
WHERE: San Carlos Library, San Carlos CA
WHAT: Pirates & mermaids
COST: Free

WHEN: Saturday October 17, afternoon (12:00-3:00 p.m.)
WHERE: Circle of Hands, Sebastapol, CA
WHAT: Lenka Vodicka, author of Forest Fairy Crafts will also be there (2 book authors for the price of one -- a great opportunity to have your books signed!) 
COST: a small fee for supplies

If you happen to live in Northern California, perhaps I will see you at one of these events.  If you do not live in Northern California, then keep your fingers crossed -- as my children get older, I hope to be able to travel farther afield for book signing and doll making events!